

How Do You Leak Test Filter Bags?
From reading the warning signs to how a leak test works, the test steps and what to do next
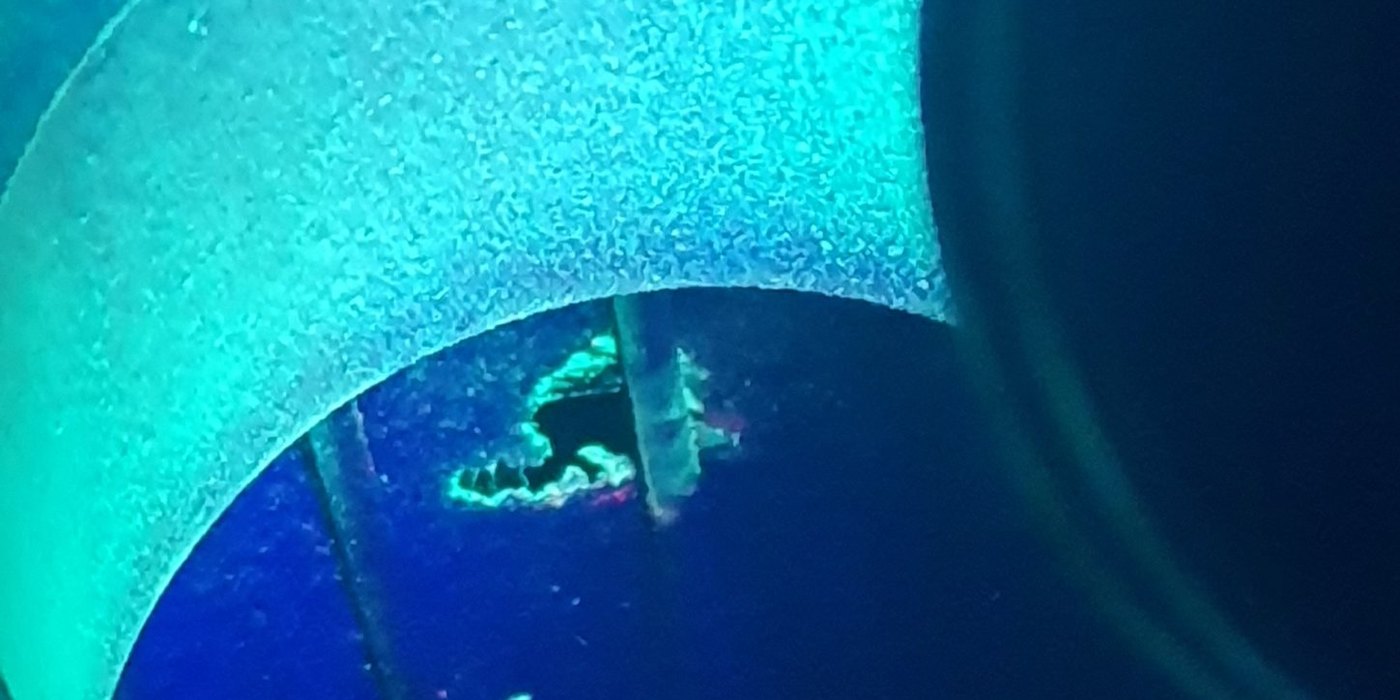
The inside of a filter bag lit with a UV lamp during a leak test. Green powder glows along the edge of the hole where the bag has torn.
Source: Micro-one Co., Ltd. field photo
01 · SYMPTOMS
What Are the Signs of a Filter Bag Hole?
Baghouse holes usually show up through four signs.
- The stack monitor (CEMS) reads higher dust than usual. If dust readings stay elevated under the same operating conditions, dust is getting past the bags somewhere.
- Stack dust readings spike right after pulse cleaning. Dust that entered through the hole and settled inside the bag (on the clean side) is blown upward by the cleaning pulse and carried out. If readings spike with every pulse, suspect a hole first.
- Dust is visible at the stack. Visible emissions and a continuous dust discharge are the clearest signs.[1]
- Dust has built up on the clean side of the tubesheet. The spot where dust has built up is itself a clue to the location of the hole or leak.[1]
In Korea, stack CEMS (TMS) data are reported as 30-minute values made by averaging or summing six 5-minute values.[2] If dust spikes with every pulse, the margin on the 30-minute average shrinks accordingly. When these signs appear, schedule a leak test before emissions exceed the limit.
02 · HOW IT WORKS
How Does a Leak Test Find a Hole?
A leak test is an inspection method in which, with pulse cleaning stopped and only the ID fan running, fluorescent powder is injected on the dirty side, such as the hopper or inlet duct; the ID fan is then stopped and the clean side (above the bags) is inspected with an ultraviolet (UV) lamp to find where the powder glows. Anywhere the powder glows is a potential leak path.[4] However, powder that passes through a failed bag can spread on the clean side and settle on the tops of neighboring bags, so intact bags can look as if they have holes. An experienced technician who can judge the amount and pattern of the glow and inspect inside the bags should make the call.
The principle is simple. Fluorescent powder injected on the dirty side is captured by the bags in the same way as the dust. If a bag is intact, the powder stays on its surface and does not reach the clean side. If a bag has a hole or is not sealed properly against the tubesheet, the powder passes through that gap to the clean side.[8] So when the ID fan is stopped and a technician checks the bag tops one by one with a UV lamp in the darkened clean side, the bags that let powder through glow, and the failed bag can be found right away.[8]
- Inject during operation: With pulse cleaning stopped and the ID fan running, inject fluorescent powder on the dirty side, such as the hopper or inlet duct. Intact bags capture the powder on their surface, while a bag with a hole lets powder through to the clean side.
- Stop and darken: Once the powder has circulated through the baghouse, stop the ID fan and darken the clean side.
- UV inspection: A technician enters the clean side (above the bags) and checks the bag tops one by one with a handheld ultraviolet (UV) lamp.
- Confirm the failed bag: The top of the bag that let powder through glows. Shine the lamp inside the bag to confirm the hole.
- Replace with a new bag: Remove only the failed bag, install a new one, and repeat the test with a different powder color.
The numbers at the top left of the animation are the step numbers above. This is a concept animation to explain the principle; actual equipment shapes and dimensions differ.
Source: Micro-one Co., Ltd. · 3D concept animation · not to scale
03 · TEST PROCEDURE
What Are the Steps of a Leak Test?
A field leak test runs in seven steps, from choosing the injection point to retesting with a different powder color.
- Injection point: Inject on the negative-pressure dirty side, such as the hopper or inlet duct. If using the inlet duct, choose a point as close to the baghouse inlet as practical.[4]
- Stop pulse cleaning, keep the ID fan running: Stop pulse cleaning and keep the ID fan running. Stopping pulse cleaning for a while helps the powder gather at the leak paths.[4][5]
- Circulate, then stop: Let the powder circulate through the baghouse for about 5 to 10 minutes, then stop the ID fan.[5]
- Inspect with UV: Enter the clean side (above the bags), darken the area, and check the bag tops, tubesheet, snap bands and seams one by one with a handheld UV lamp.[4] Follow site safety procedures for confined space entry and lockout, and wear UV-protective glasses.
- Record locations: Mark every glowing location on the baghouse layout.[4]
- Repair: Reseat loose bags and replace bags that are torn or have damaged seams.[4]
- Retest with a different color: After repairs, retest with a different powder color (for example green if pink was used) to confirm the original leaks are fixed.[4]
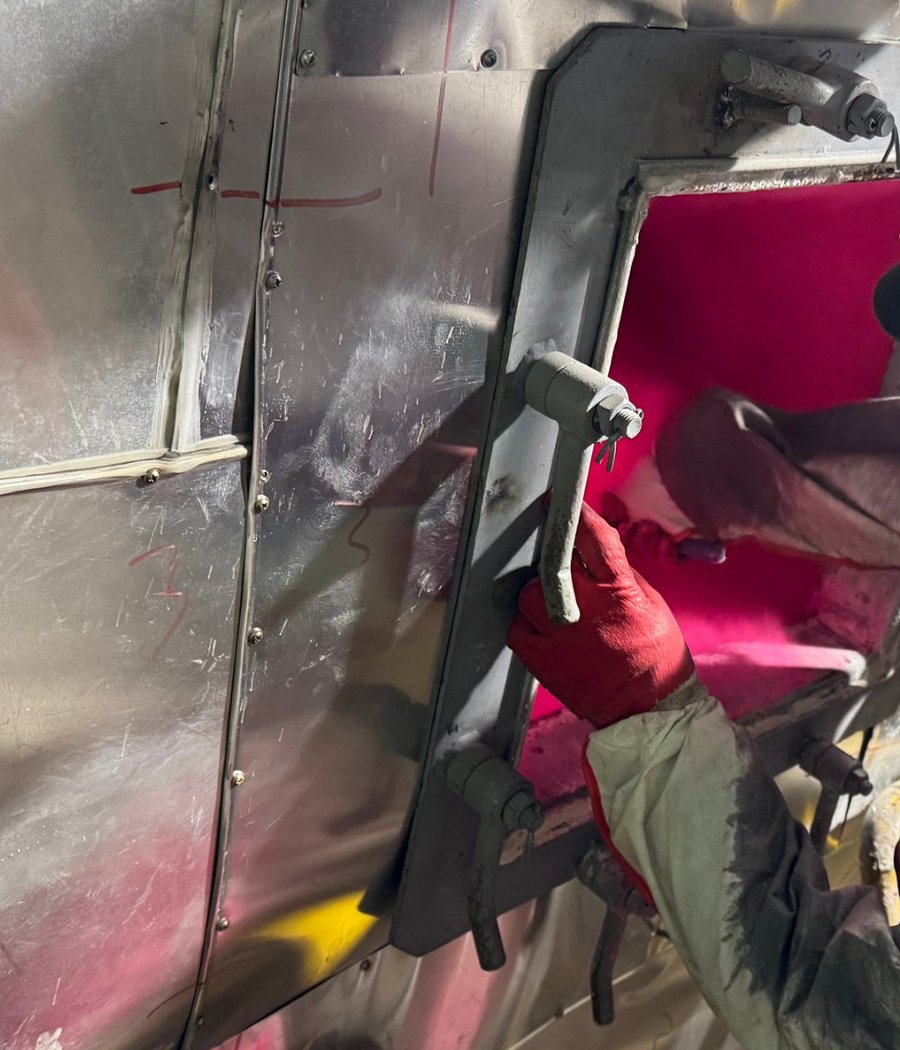
Figure 3. Injecting pink powder through an open hopper access door
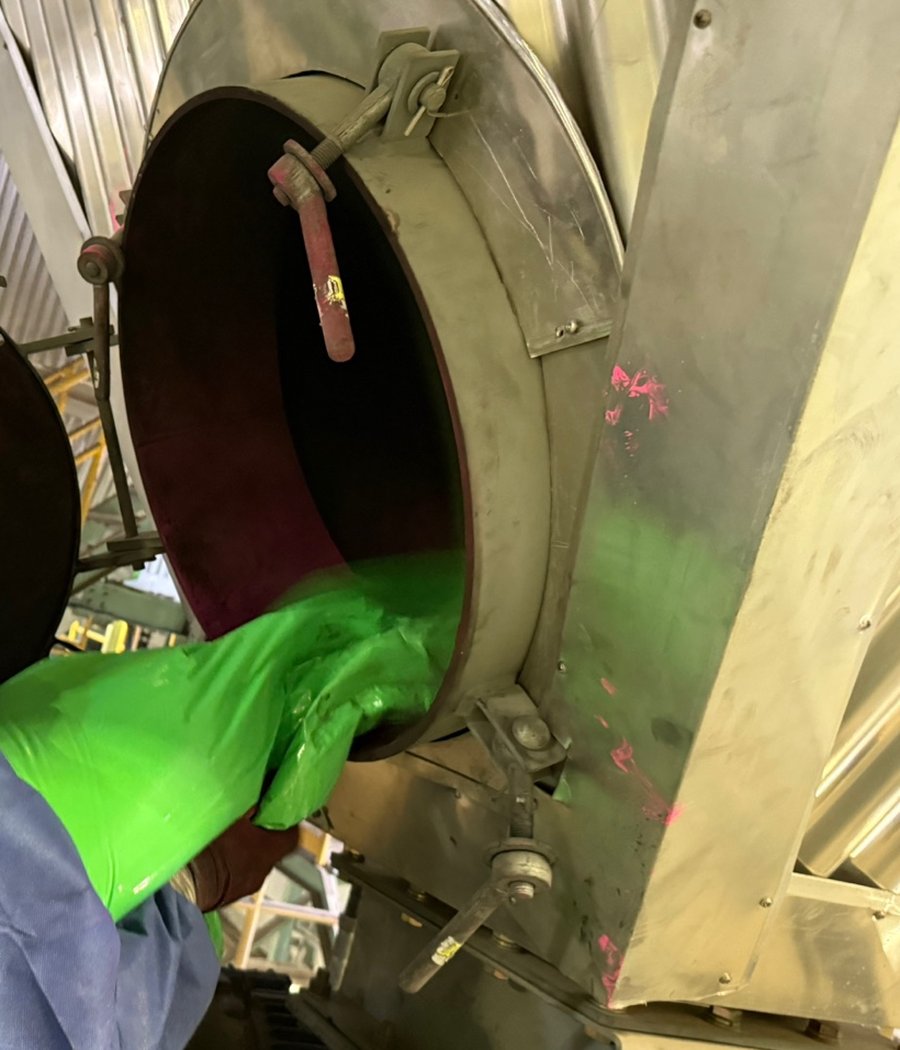
Figure 4. Pouring green powder into a round hopper access port
With pulse cleaning stopped and the ID fan running, the powder is injected through a hopper access port and carried by the gas flow to the bags.
Source: Micro-one Co., Ltd. field photo
In the field, pink and green powders are used most often. Choose a color that stands out against the process dust, and alternating the two colors between tests makes it easy to tell leftover powder from new holes.[4][6]
A badly blinded set of bags can pass dust evenly across the whole set rather than through one hole.[4] In that case no single spot glows brightly, so check the bag condition and operating conditions together.
04 · LEAK LOCATIONS
Where Do Holes and Leaks Usually Occur?
Holes and leaks mostly occur in the filter media and at the mounting area where the bag top meets the tubesheet.
The cause of a hole depends on where it is and what it looks like. Hole types such as those at the top, bottom, seam, random spots and in rows, and their causes, are covered separately in “What Types of Holes Occur in Filter Bags?”.
A leak test also checks leak paths other than holes where powder can pass. Typical spots are the ring where the bag top meets the tubesheet, the edges and joints where the tubesheet meets the wall, and the inside of the bags.[8]
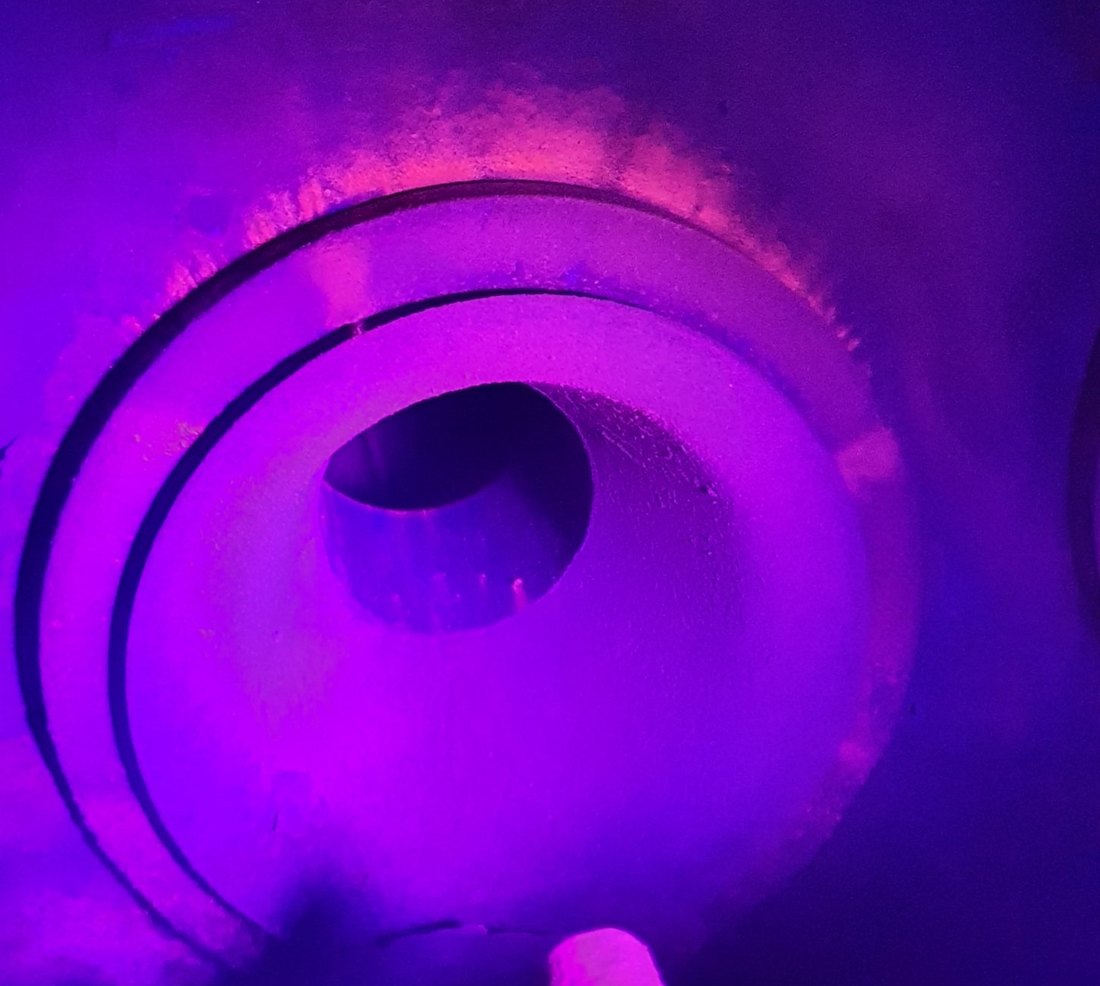
The top of another bag under UV light. Powder that entered through the tear rose inside the bag and built up around the top and the tubesheet, glowing pink. When a bag top glows like this, shine the lamp inside that bag to find the tear and replace the bag.
Source: Micro-one Co., Ltd. field photo
05 · AFTER DETECTION
What Happens After a Bag with a Hole Is Found?
Once a bag with a hole is found, the response follows this order: reseat or replace, check the cage, investigate the cause, clean the clean side, and retest.
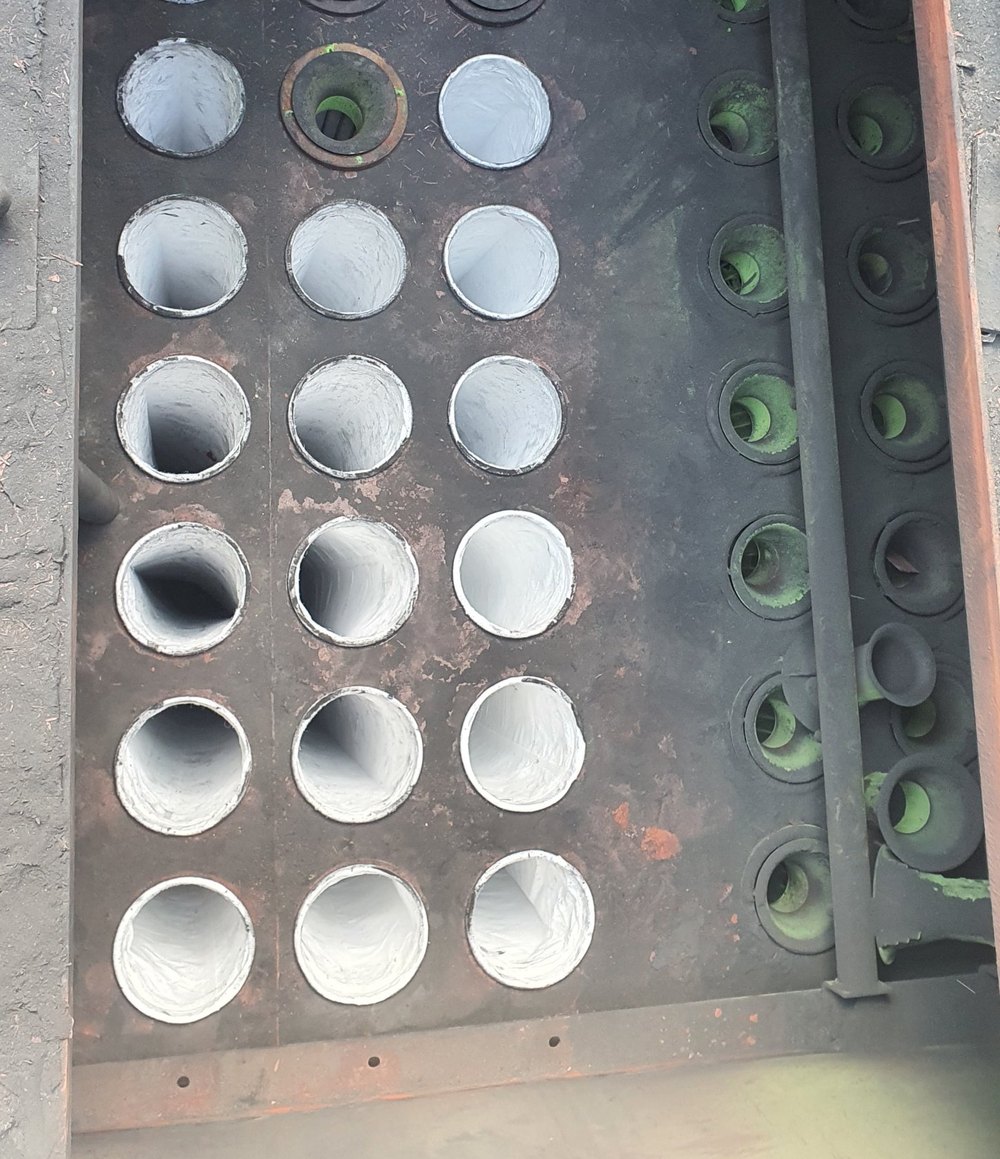
A tubesheet during bag replacement. A row of clean openings stands next to a row with green powder left on it. When replacement is complete, clean the clean side and retest with a different powder color.
Source: Micro-one Co., Ltd. field photo
- Reseat or replace: Reseat loose bags and replace damaged ones.[4] Finish the corrective action for each leak zone before moving to the next.[1] For the replacement method, see the filter bag replacement guide.
- Check the cage: Inspect the wires and bottom pan edge of the cage that held the damaged bag.[7]
- Investigate the cause: Identify the underlying cause of the damage separately.[1] If the differential pressure also changed, use the pressure drop checklist to check the operating conditions as well.
- Clean the clean side: Before restarting, clean the clean-air plenum, the clean-side ducts and the fan.[1] Removing leftover dust and powder makes it possible to tell new holes apart at the next inspection.
- Retest: Retest with a different powder color to confirm the leak is gone.[4]
Only as a temporary measure. Plugging reduces the filter area, which raises the air-to-cloth ratio of the remaining bags, and the cause of the damage remains. If you plug, seal the hole completely with a proper plug and record its location, then replace the bag and check the cause as soon as possible.
FAQ
Frequently Asked Questions
Is the fluorescent powder used for leak testing classified as hazardous?
No. According to their safety data sheets (MSDS), the pink and green fluorescent powders Micro-one uses are not classified as hazardous and are not designated toxic substances under Korea's Chemicals Control Act. The main component is a benzoguanamine-formaldehyde resin (80–100%), with up to 10% colorant (pink: red dye plus less than 5% silica; green: Pigment Green 7). Lead, mercury and cadmium are not on the ingredient lists. Pigment Green 7, the green colorant, is a copper complex bound within an organic pigment molecule. If you use another product, check its own MSDS.
Should a leak test also be done right after bag replacement?
Yes. Right after replacement is regarded as the best time to find installation problems.[4] US EPA best practices also note that a fluorescent test may be needed after new filter media is installed.[3]
Does the ID fan have to be stopped for a leak test?
Yes. The powder is injected with the ID fan running, but the inspection requires stopping the ID fan and pulse cleaning, locking out the equipment and having a technician enter the clean side with a UV lamp.[8] That is why the test is often scheduled with routine maintenance or bag replacement.[4]
- Donaldson, “My Dust Collector Is Leaking” (manufacturer material). Link
- Korea Environment Corporation CleanSYS, “Glossary” (30-minute data). Link
- US EPA Region 5, 「Best Practices for Bag Leak Detection Systems in Clean Air Act Permitting」, 2023. Link
- Baghouse.com, article on fluorescent powder leak testing (manufacturer material). Link
- Baghouse.com, “Baghouse Recommended Preventative Maintenance Schedule & Leak Test Instructions” (manufacturer material). Link
- Baghouse.com, “Leak Test Powder” product page (manufacturer material). Link
- Micronics, “Six Types of Bag and Cage Damage” (manufacturer material). Link
- US Army, “TM 5-3895-374-24-2” Black Light Test – Leak Detection, 1993 (public copy of a maintenance manual). Link